Disappearing 9-Patch with LAYER CAKES Use 10-inch squares for this Queen Size Quilt
 Jen Eskridge
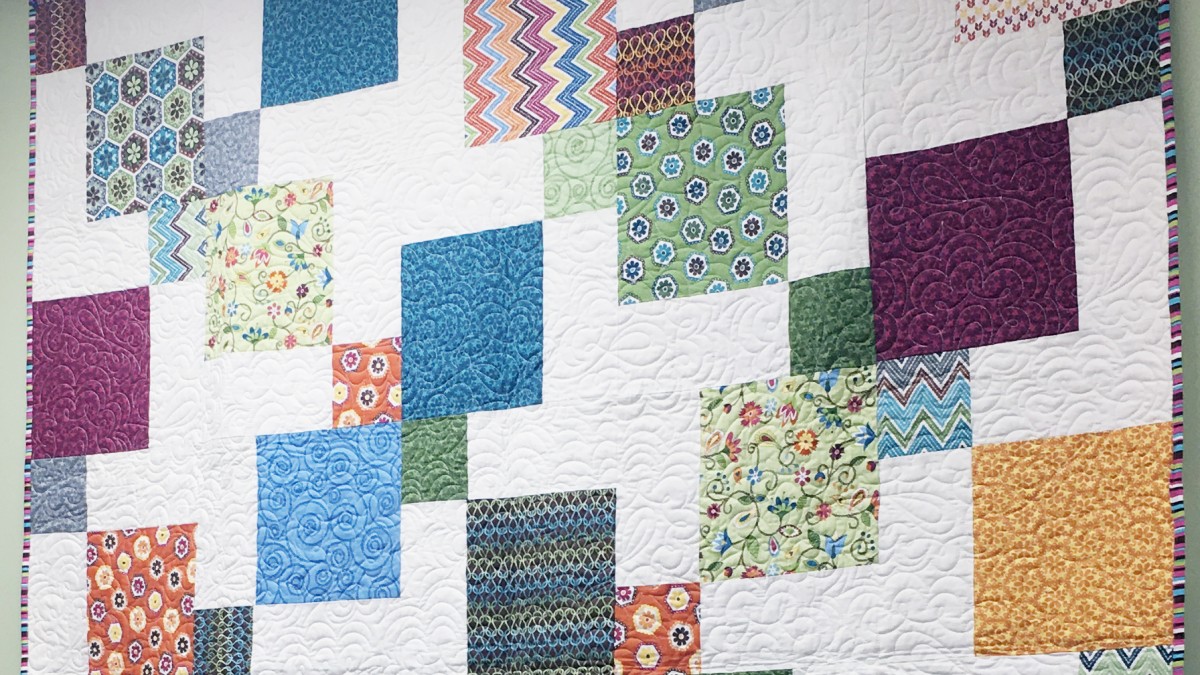
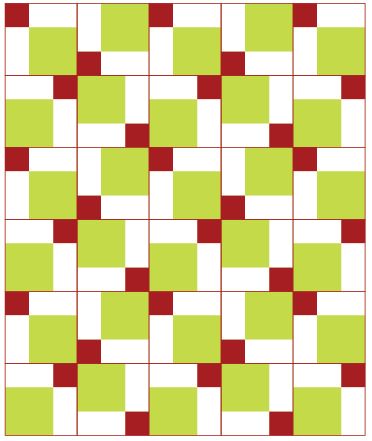
Love Disappearing 9-Patch but want to make it bigger and faster? Good news! Use this tutorial to create a Queen Size Quilt in an afternoon!
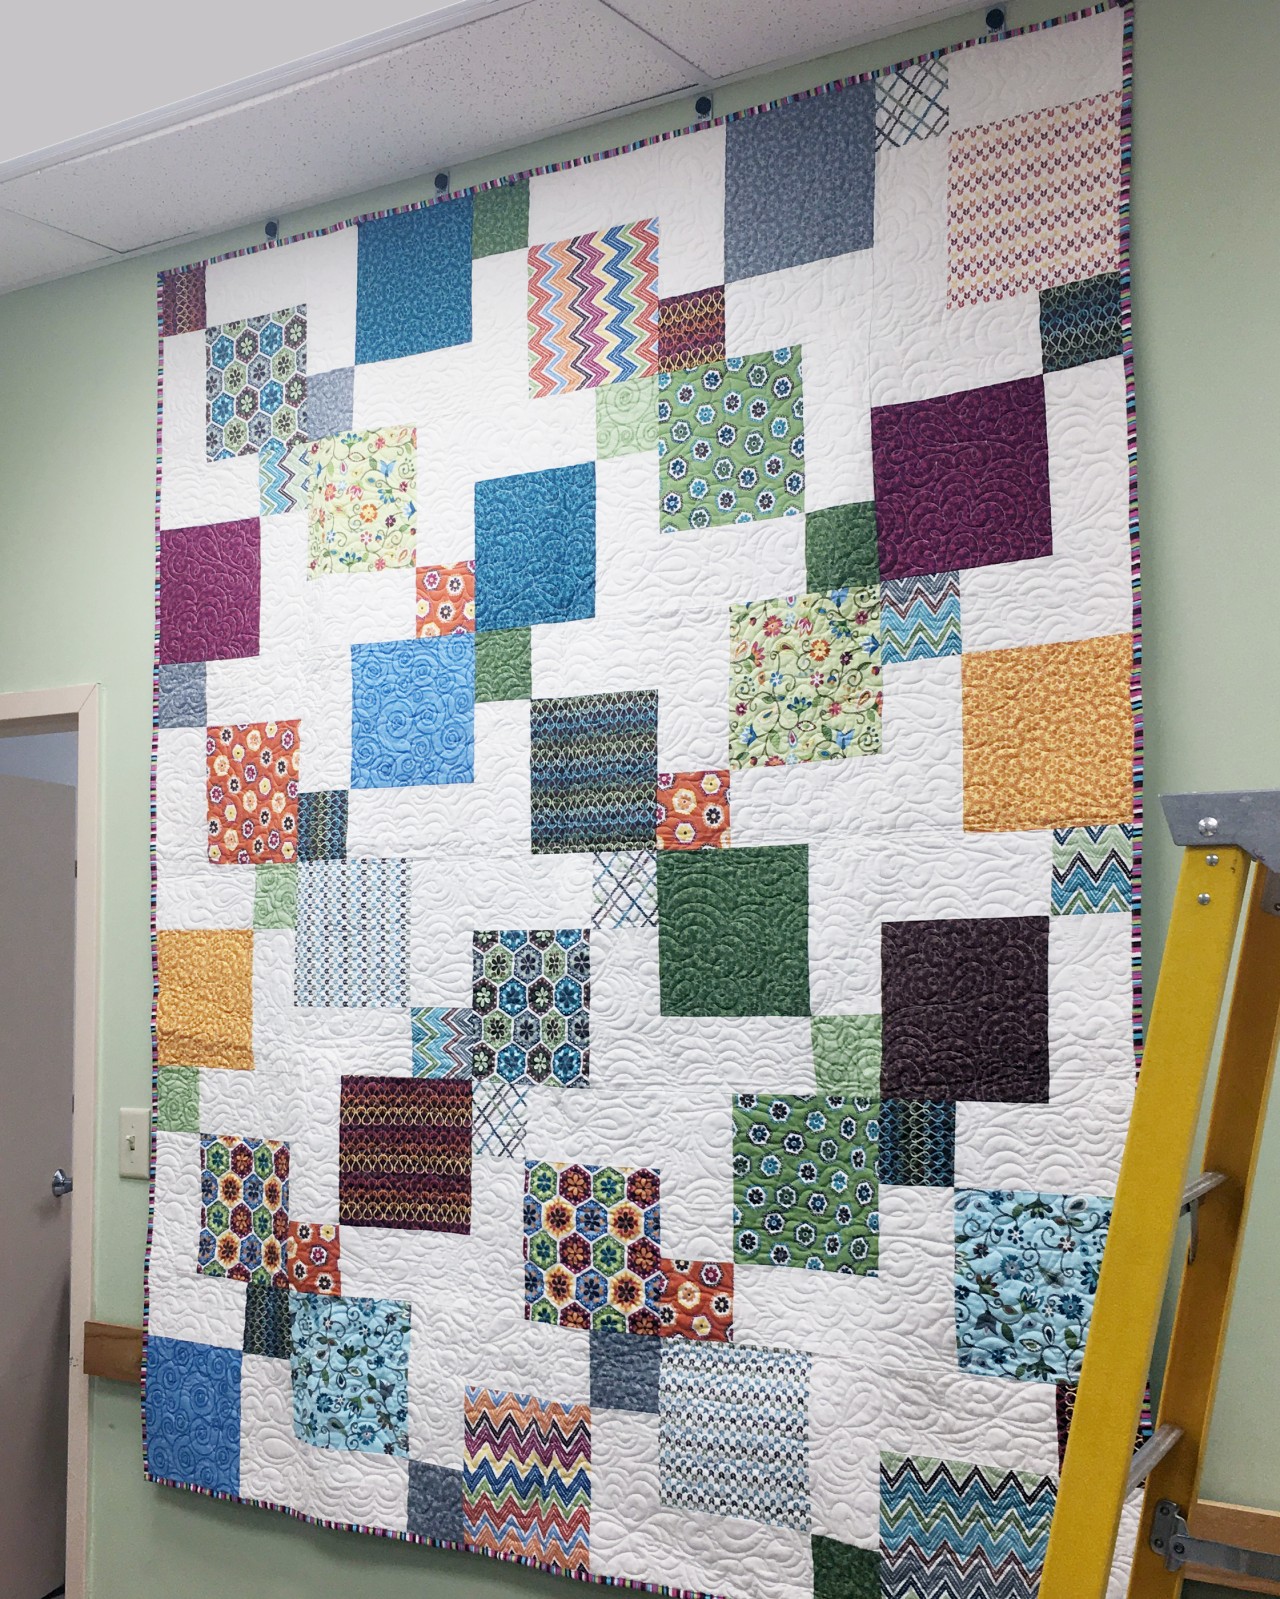
Finished Size: 75″ x 90″
Supplies
- 1 Layer Cake*
- 2 1/3 y White yardage
*Layer Cake is a precut 10″ x 10″ square of fabric with at least 40 pieces. 40 pieces are used in this tutorial.
Cutting
- From the white yardage, cut 8 strips at 10″ wide
- From the 8 strips, cut 4 squares 10″ x 10″ each
- Yield a total of 32 white squares
Construction
Make the 8 large blocks
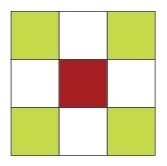
- Using a 1/4" seam allowance (or a serger) and matching right-sides together. Sew a nine-patch block like the one shown above.
Notice that the block only features 4 white squares. The red and green squares represent the 10" square prints in the layer cake. Scroll to the end of the post to see what happens if you switch the color placement.
- Press seam allowances towards the darker fabric.
Slice the Blocks
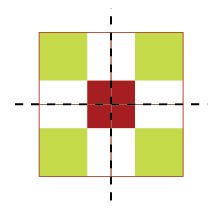
- Slice each 4 patch block into quarters. Honestly, this is the hardest step because you’ll want to make sure you cut the pieces exactly in half and you’ll need a large space to rotary cut them.
- Pressing each block very well will make this step easier.
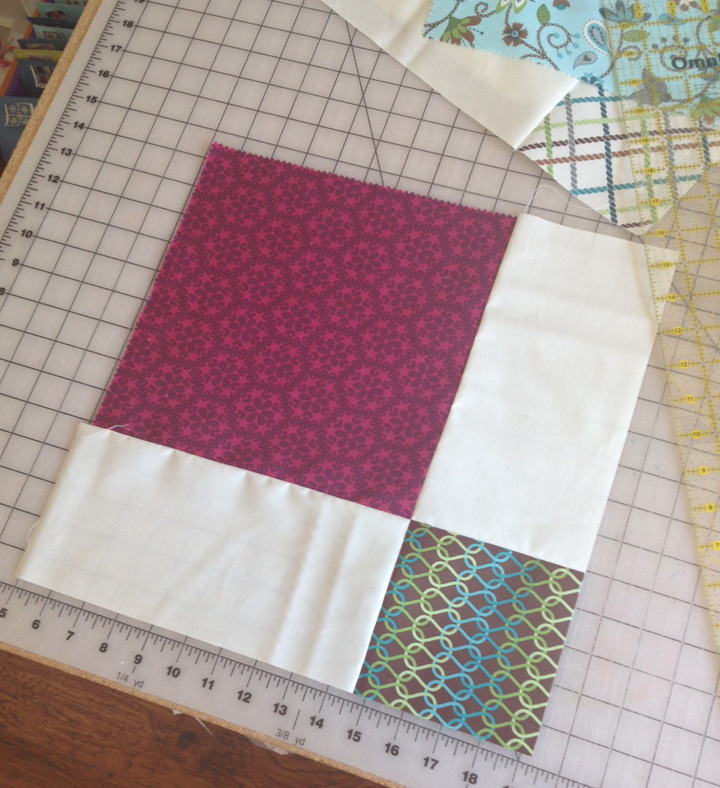
- Each quarter of the 9-patch block will be HUGE and look something like this:

Stitch the Block Units
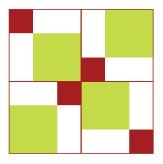
- Mix up the quarter pieces to get a more scrappy look to the quilt design.
- Mix them up and rotate two of them as you will use 4 total quarter pieces to rebuild each block.
- This is where the disappearing 9-patch magic happens.
- Using a 1/4" seam allowance or a serger, build only SIX (6) blocks, even though you started with a total of 8. Trust me.
Build the Quilt Top
See the block unit shadowed in the upper left in the image below?
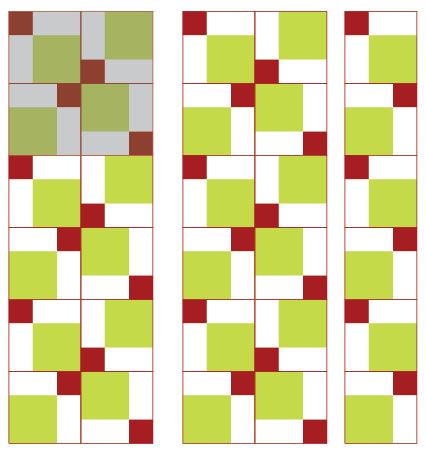
- Join three blocks together to form two big columns.
- Press the seams in column 1 up and the seams in column 2 down.
- Sew the two large columns together.
- Lay the two columns on the floor to make sure the “quarters” are rotated in the right direction to keep the Disappearing 9-Patch pattern going. I recommend that, so you will have less un-sewing to do later.
- Arrange the remaining six quarter-pieces and joined those in pairs, then pairs of pairs to get a total of 6 quarters in a vertical row. This is the row on the far right in the image. Press these seams up.
NOTE: YOU WILL HAVE TWO QUARTER PIECES LEFT OVER.
Quilty Inspiration
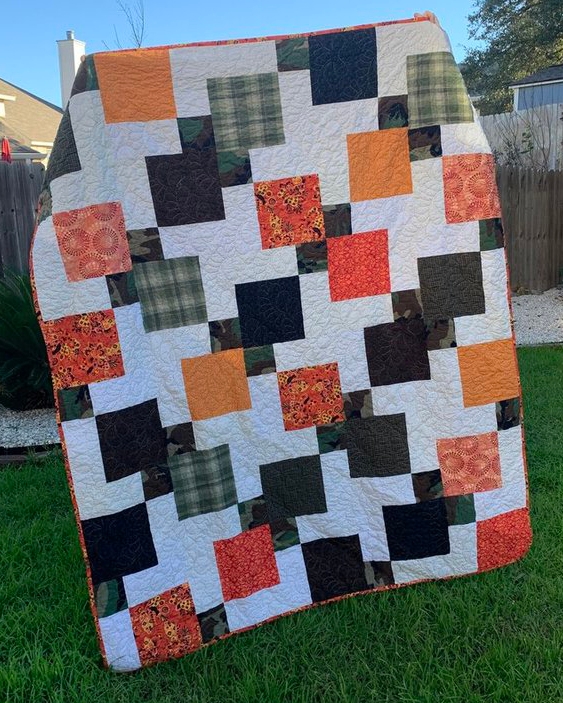
Because this quilt is so fast and easy, I've personally made quite a few of them. Here's some pics to inspire your Disappearing 9-Patch journey.
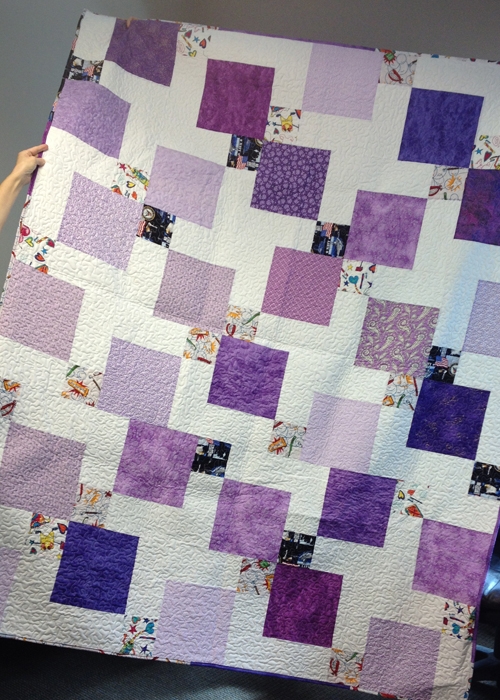
In these two samples, I ended up cutting my own "layer cake" or 40 pieces of 10" x 10" to get a custom look. This includes cutting military uniform fabrics to use in the orange quilt below.
Now here's a neat trick:
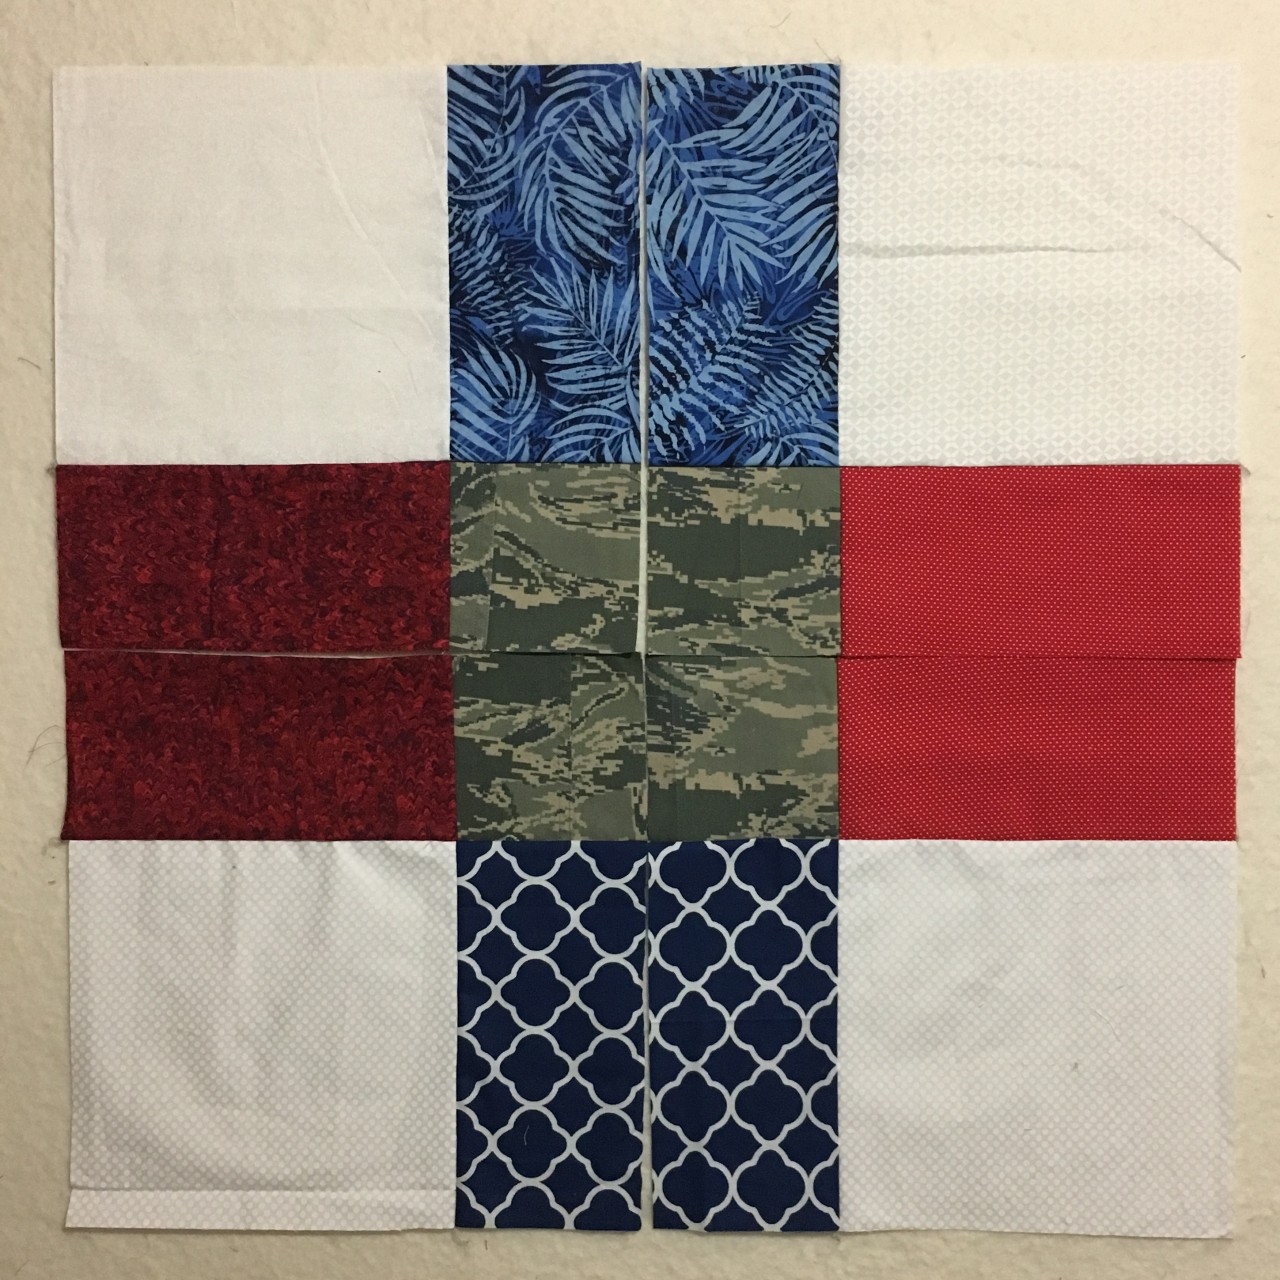
If you happen to use only 4 prints per block instead of the white in that space, you get a slightly different project. The construction is absolutely the same, but the quilt will look totally different.
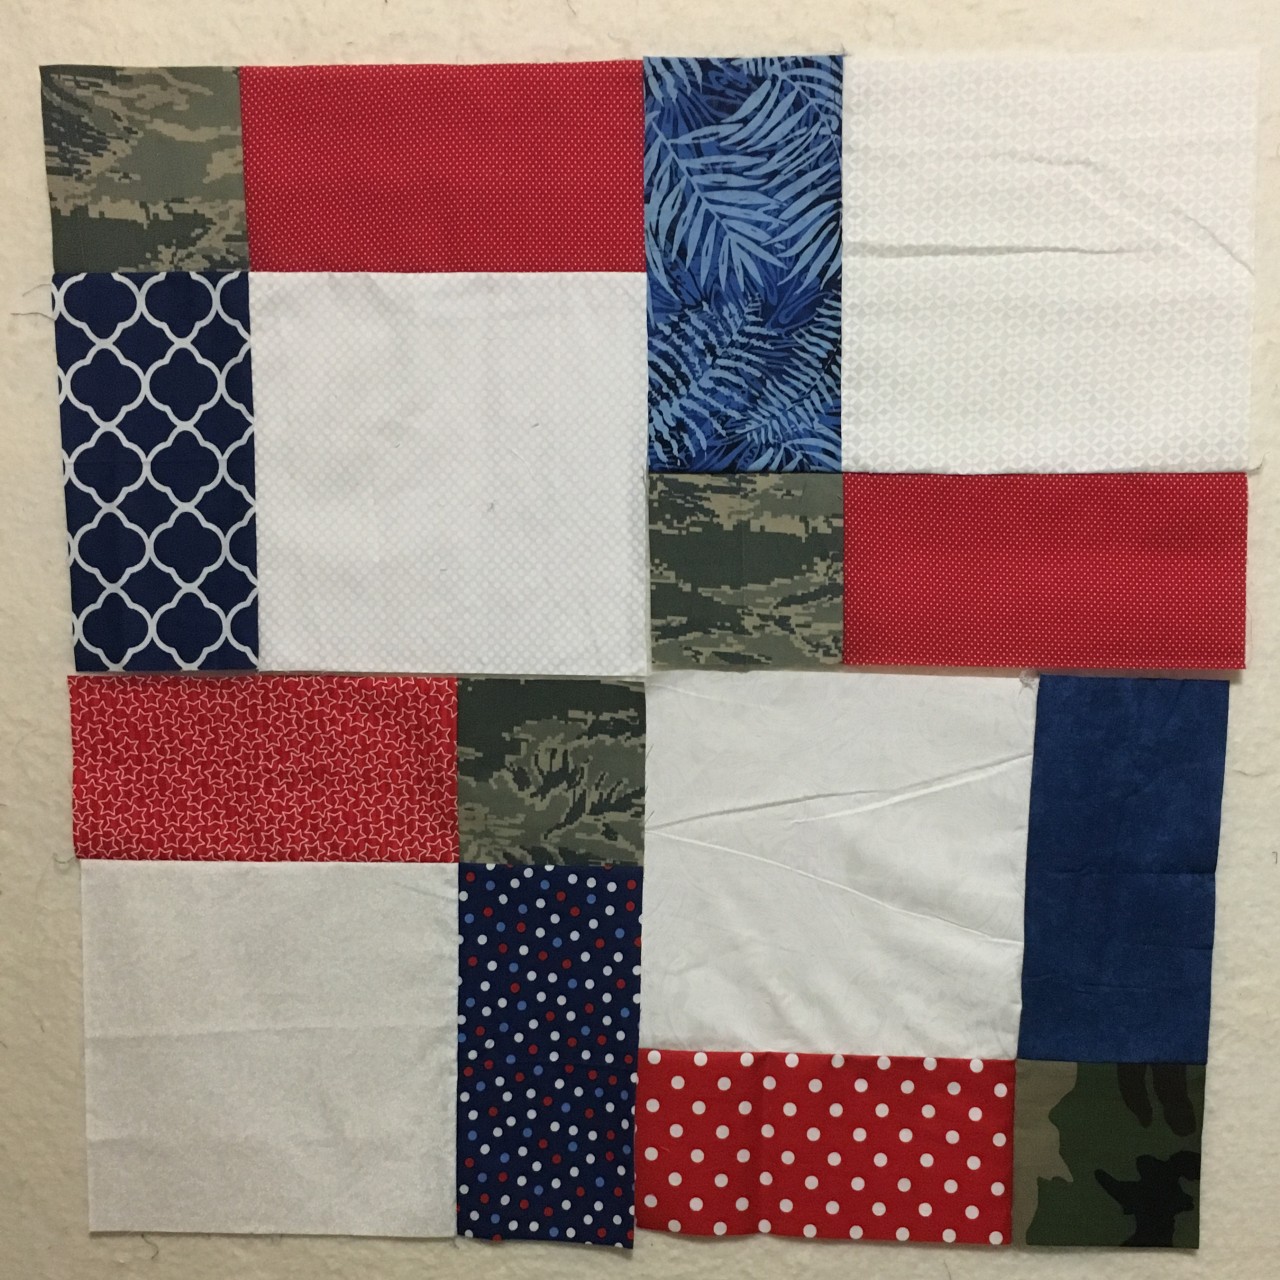
This is the block. (It also features military uniform fabric.)
Then, just as before, I sliced the block in half twice.
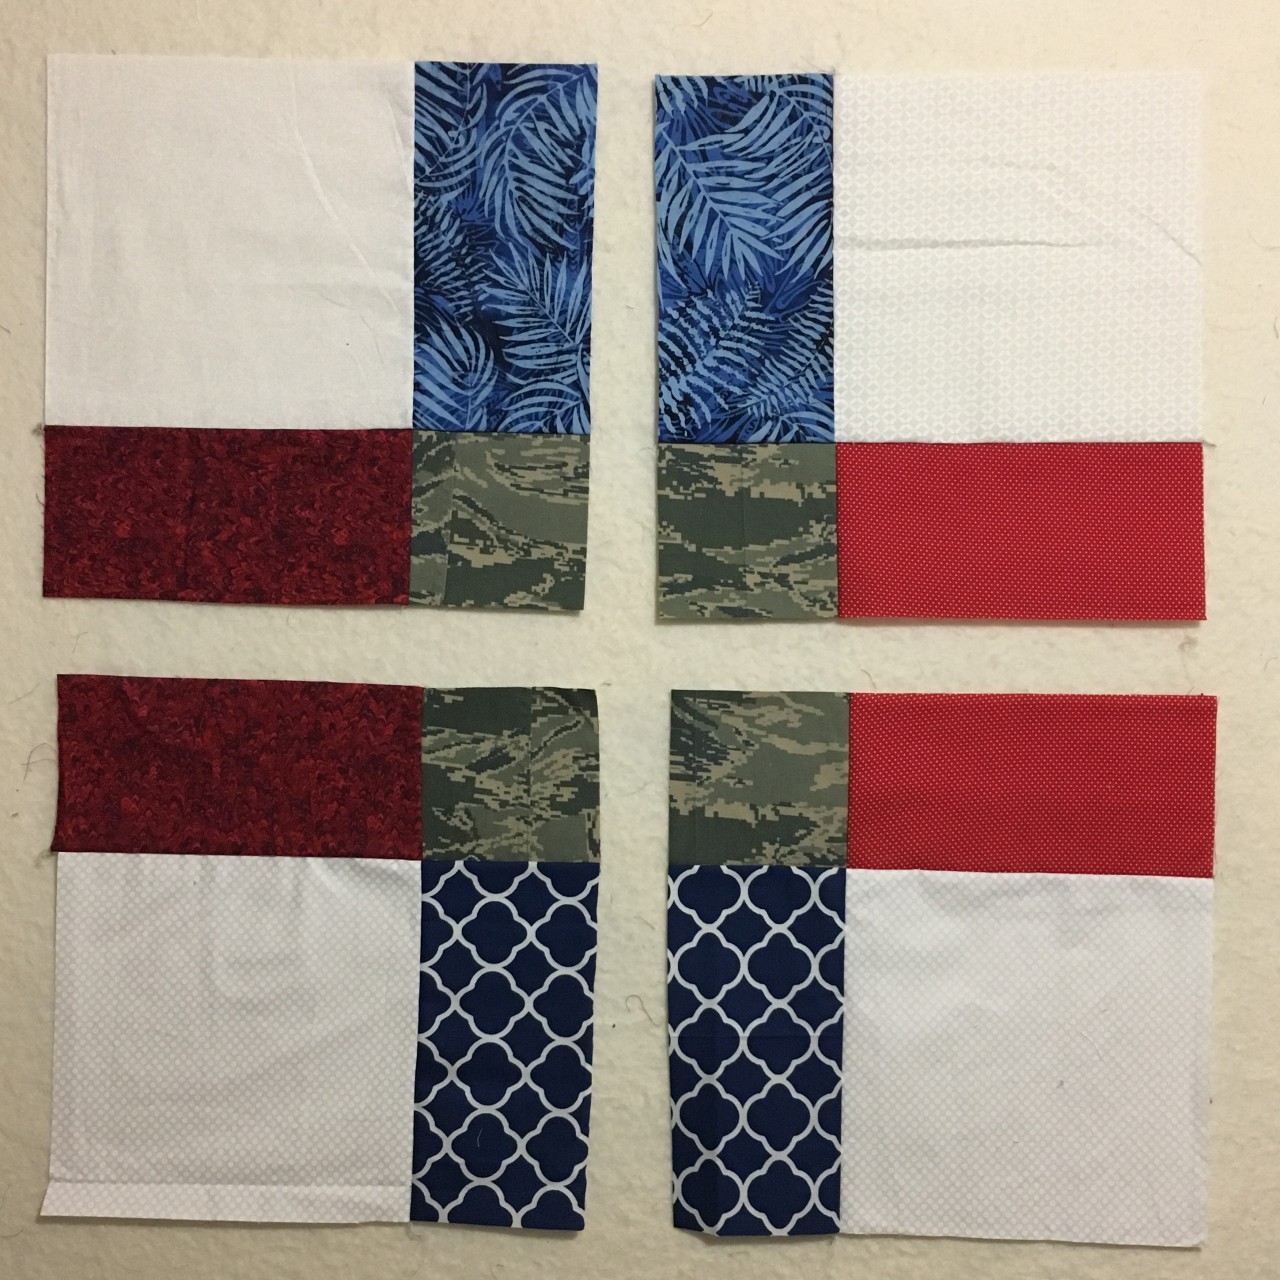
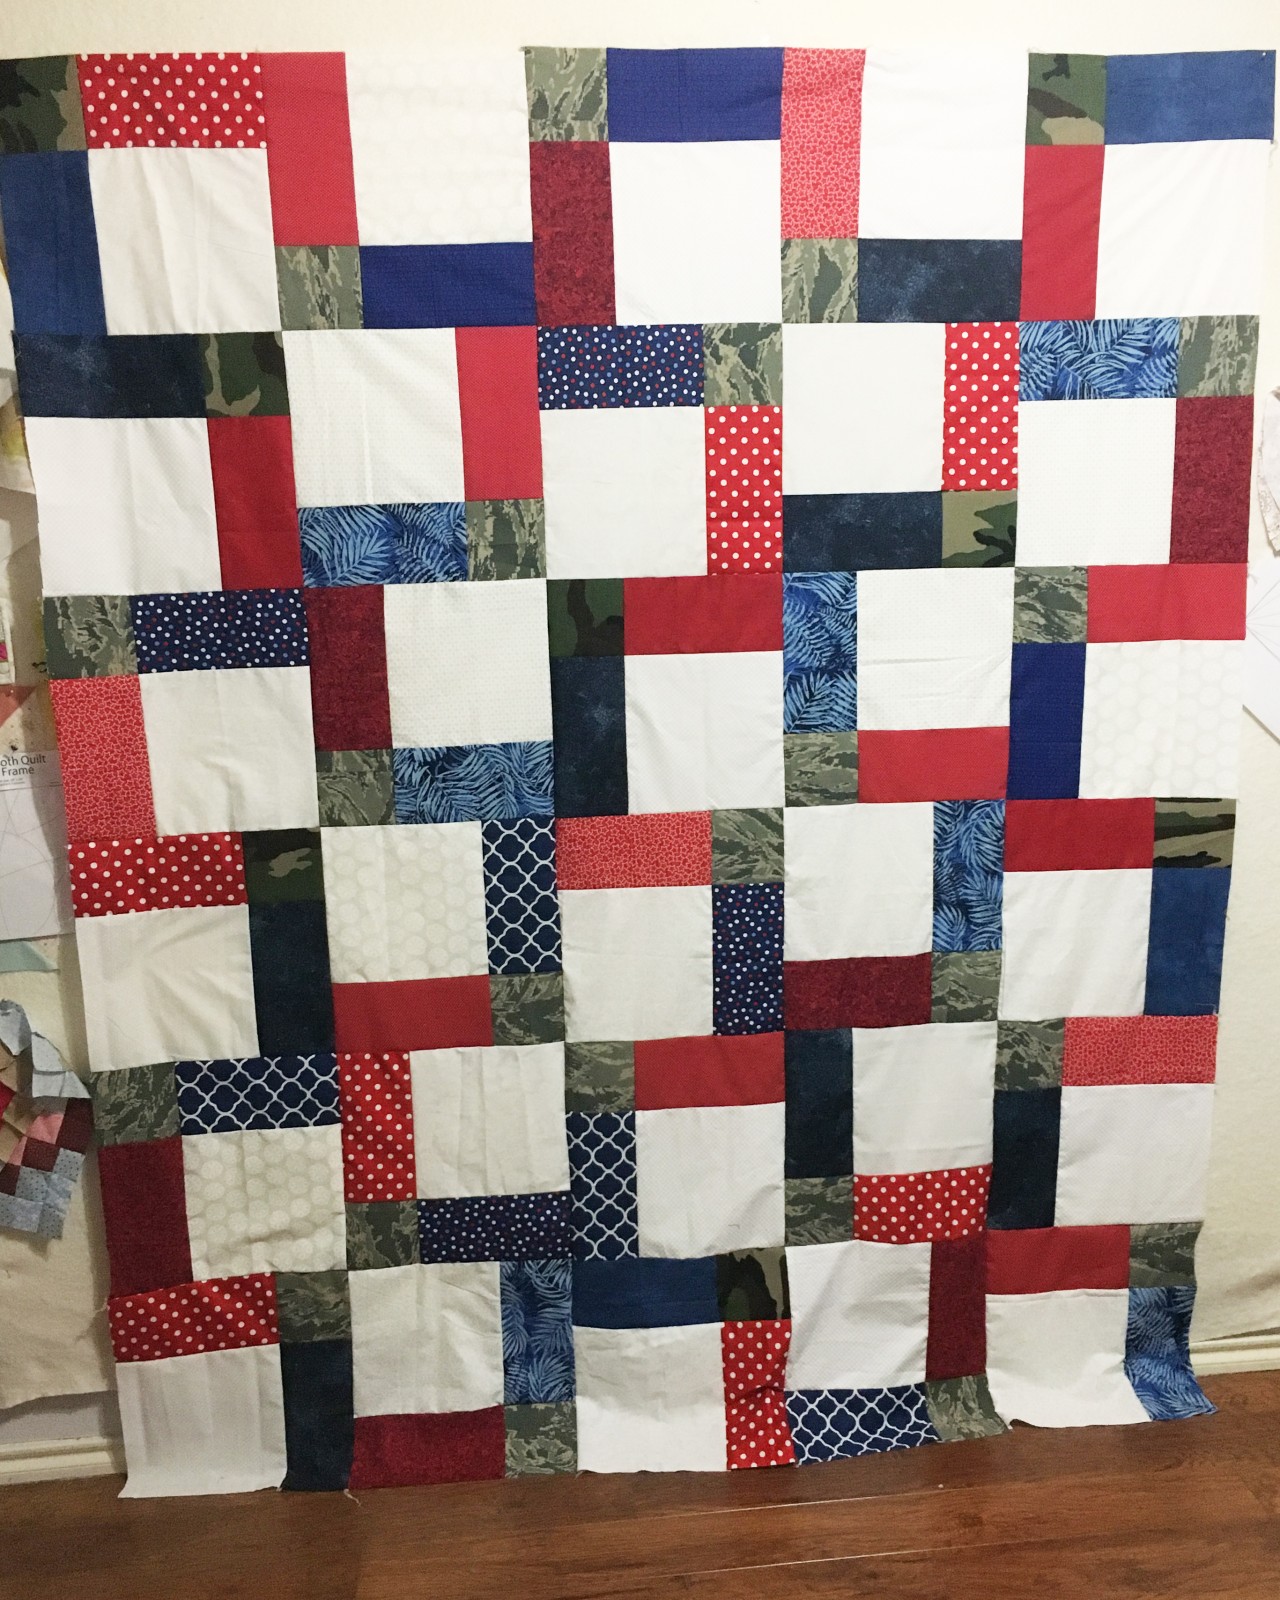
And arranged the the design turning the lower right and upper left blocks.
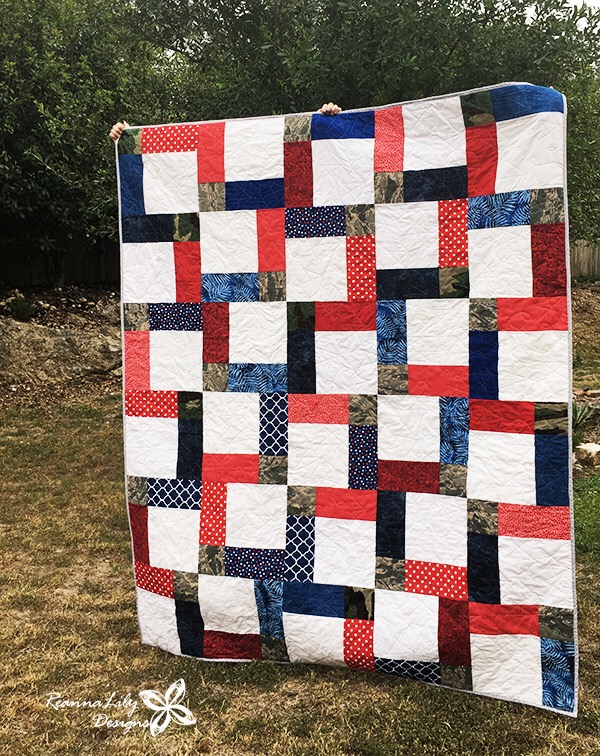
The resulting quilt looks more like a lattice than floating squares.
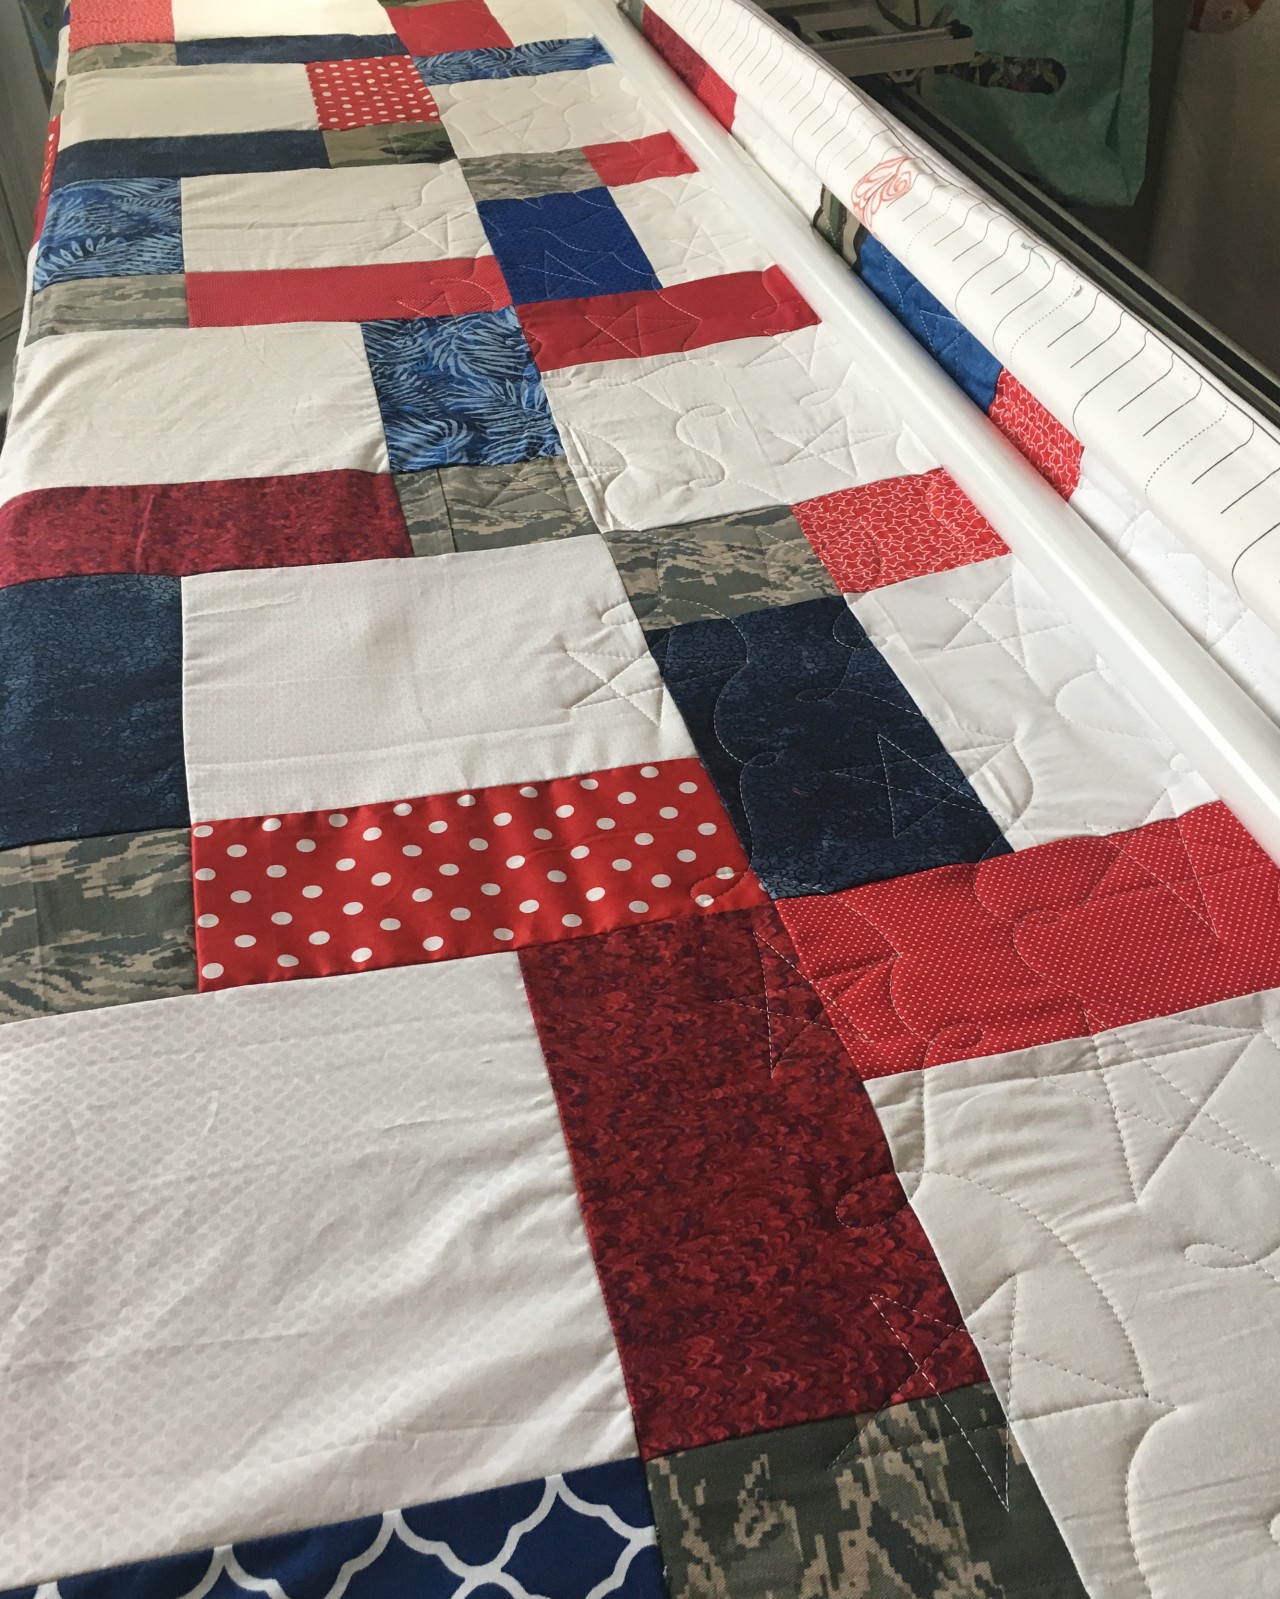
It is quilted with free-motion stars on my longarm quilting machine.
And now you have (sorta) two variations of one really fast and easy quilt!
Give it a try and tag #quiltyquill if you share it online.
*This post may contain affiliate links.
See more items from the Quilty Quill here:
Web: https://www.quiltyquill.com
YouTube: https://www.youtube.com/@QuiltyQuill
Instagram: https://www.instagram.com/quiltyquill/
Facebook: https://www.facebook.com/QuiltyQuill
Categories: : Tutorial
I have read and agree to the terms & conditions.